
RSN Passimentiere Part 4: Assembly
Assembling the tassel took the least amount of time of all the steps. It was a bit fiddly but really not too difficult and, as it came together, it was wonderful to see the component parts run into a beautiful piece of passimentiere. (I just love that word!)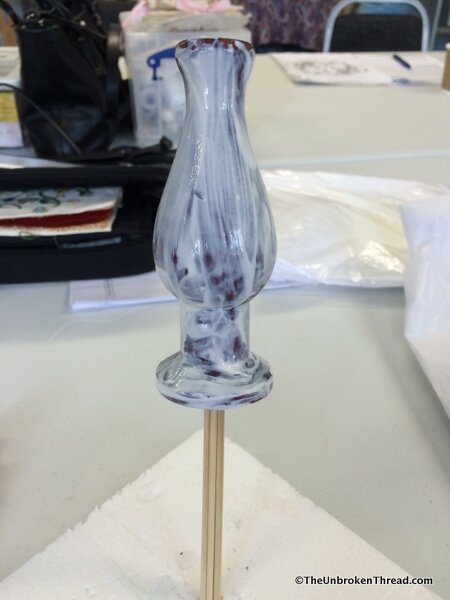 The first step was to put skewers (or a dowel) through the hole in the tassel head and stitch the skewers into a piece of foam so it didn't fall over while I was smearing it with glue. I'm sure there are many many ways to hold the tassel top in place as you cover it with glue, but this works and was cheap.Using Copydex glue, I covered the tassel head with glue and then let it sit for about 20 minutes to 'dry' to a sticky consistency. I then covered it again and let it sit for another 20 minutes. This gave me a nice sticky but not runny surface on which to wind the cord onto the tassel top.
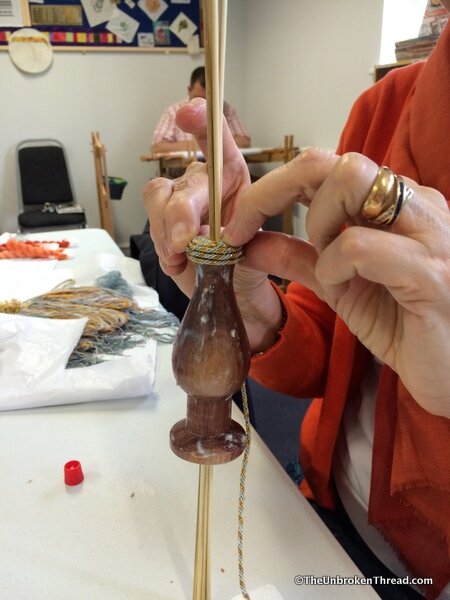 The first step was to insert the end of the cord into the hole at the top of the tassel head. Once the end of the cord was securely inside the tassel top, the cord is wound around and around the tassel top, always making sure there are no gaps between each wrap of the cord.
 Because the glue is tacky but not slippery, it's possible to move the cord after it's been put onto the form. It took some firm pressing to make sure the cord stayed in place but it was much easier than I thought it might be given the curves of the form.
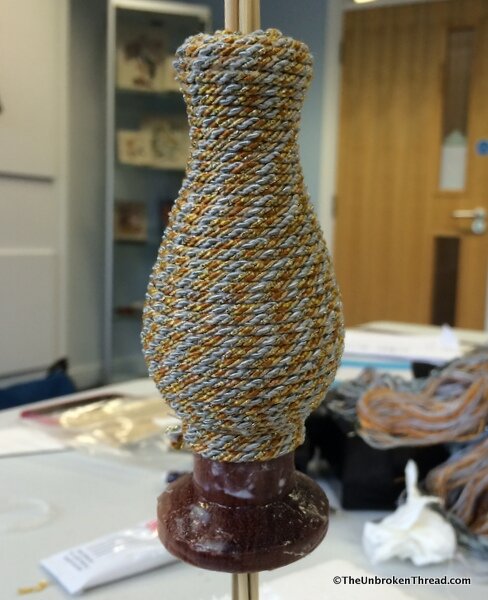 As I wrapped the cord around the tassel head, the pattern that emerged was so pretty. I imagine that it would be slightly different if I took it off and wrapped it again. There's probably some kind of magical math thing in that idea...
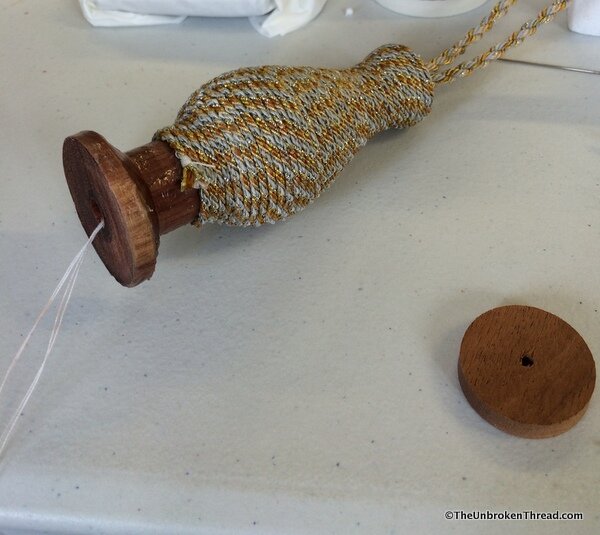 To attach the hanging cord, I threaded a large tapestry needle with buttonhole thread, pushed it through both ends of the hanging cord and dropped the needle down through the hole in the center of the tassel head form. The needle popped out the other end and I gently pulled on it to pull the hanging cord into the hole.To secure the hanging cord I used a large button (rather than the wooden disk in the photo above) and threaded the buttonhole thread through the button. Pulling the thread tight, I made sure the button was right up next to the bottom of the tassel head then I tied a secure knot so the thread wouldn't slip out.
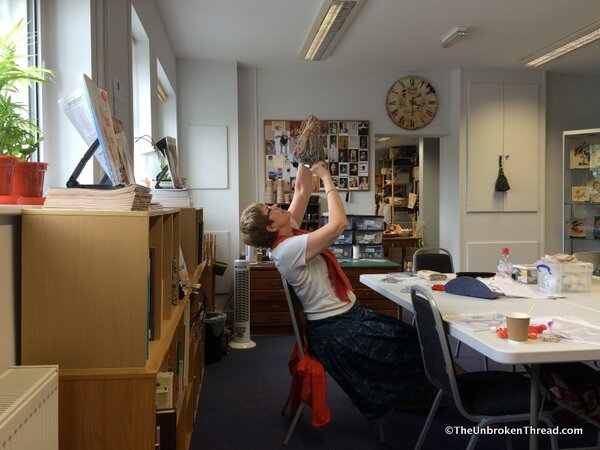 Next I had to attach the skirts. When I'd stitched all of the threads with the curved needle to create the skirt, I left enough button hole thread at the ends to tie together. This meant it was simply a matter of wrapping first the wool underskirt and the silk over skirt twice around the bottom of the form and tying the ends together.The last part was to assemble the ruff and that was attached the same way: wrap it around the form, just on top of where the skirt meets the form (thereby hiding the join which is not very attractive) and tie the long ends together.The tassel then hung for a day from a knob on a cupboard to relax and then I steamed it over a kettle to relax the threads even more The last step was to trim the bottom so it was completely even. That's what I'm doing in the photo above.
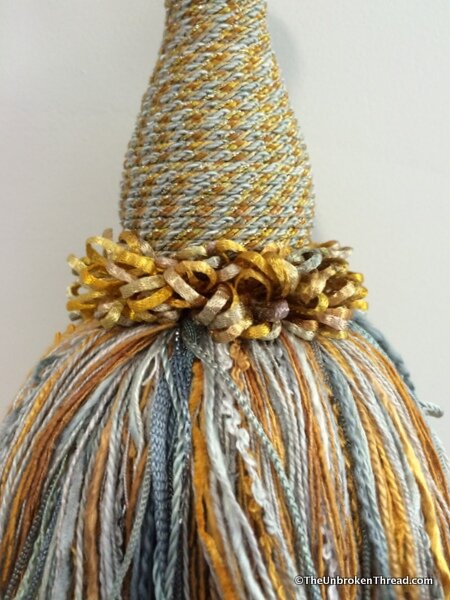 After it hung for a day, I steamed it over a boiling kettle to relax the threads even more and then trimmed to bottom to make it even. This is done "by eye" as the tassel hangs loosely.
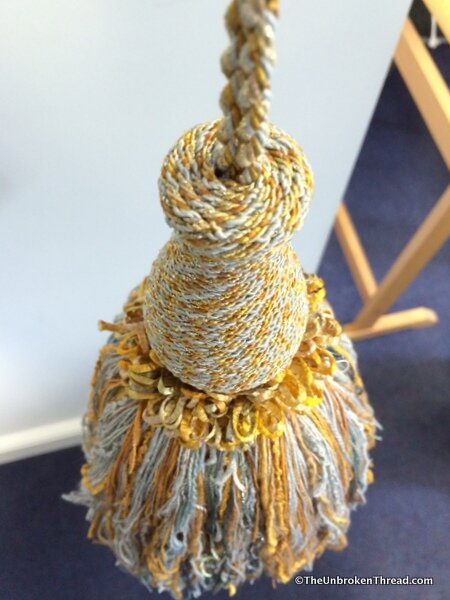 In the photos above and below that tassel is finished but not trimmed. In fact, I forgot to take a photo of the completely finished tassel and now I will have to wait for it to be sent to me from Bristol.
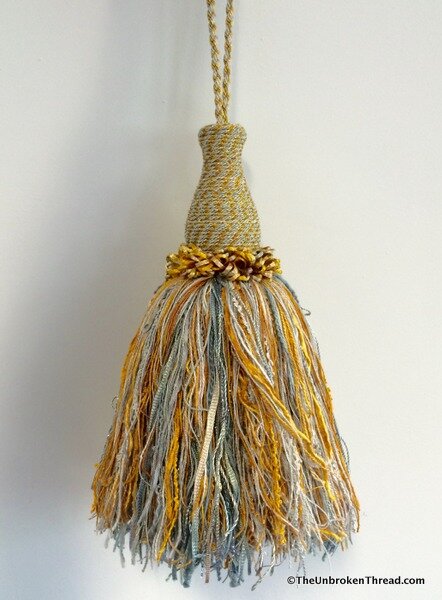 The assessment was done on the weekend after it was finished so I didn't have to wait long to find out what mark I'd earned. I got a 96% which is "with distinction" and the comments were really clear as to where I'd lost points and very positive about what was successful