RSN Crewelwork Course Day 4 - Pomegranate
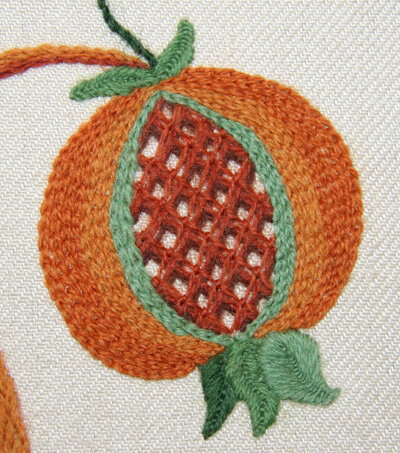
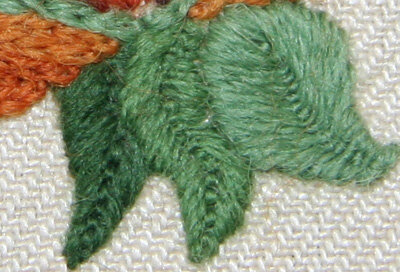
The pomegranate is one of the favorite elements in my embroidery design (the deer being the other). The golden brown/orange colors make it just glow and the green in the center and the leaves add just the right touch of cool contrast. Often pomegranates are worked in shaded chain stitch with some kind of trellis work in the center. On my pomegranate I've used battlement couching for the center. The leaves are done in closed fly stitch, worked from the bottom to the top of the leaf. Battlement couching is named after a battlement wall that might have surrounded a town or even castle. It's meant to look like a wall and it does.To achieve this look I had to work a trellis stitch in the darkest color first. I angled the horizontal and vertical stitches so they were more diamond shaped than square shaped. Then I stitched the same angle in three lighter shades - going from the darkest to the lightest as I worked and off-setting them slightly above/to the top of the previous row. The last step was to couch the top layer of stitching with a tiny vertical stitch in the same color as the top layer of stitching. For great explanations and diagrams look at The Embroidery Stitch Bible.
 The leaves are worked in three shades of green, with the darkest shade at the back. When choosing which shade to put where it's important to consider where the light would come from in the design. The leaf at the back would get the least light (so it's stitched in the darkest shade) and the one at the front the most light (hence the lightest shade of green). The closed fly stitch is worked from the top, or widest point in the leaf, to the bottom or narrowest point on the leaf.
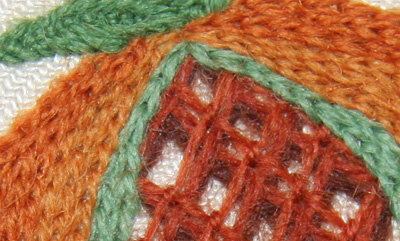
 The outside of the pomegranate is all worked in chain stitch. The most important thing when stitching the pomegranate is to make sure the outside and inside rows of chain stitch are uninterrupted. This gives the impression of the fruit being smooth and round. I began by stitching the inner row of light green from top to bottom. I then added the partial row of green on the outside to thicken the curve in the middle section before I moved on to the golden brown color.
 Here's a diagram of how I stitched the last two colors. The innermost and outermost lines of chain stitch go from the top to the bottom. This way all three colors meet at the top and give the impression of the colors merging in at the top and bottom of the fruit.
 Here I've drawn lines to show how I blended the chain stitch from one row into the row next to it. Angling the last chain stitch into the row next to it helps blend the two rows. Because the end of each chain stitch can be slightly pointed it makes it much easier to blend one row into the other.
 When working rows and rows of chain stitch next to one another, it's best if you can attempt to have each of the stitches the same length. Having some long and some much shorter looks messy and won't give such a uniform, textural look.The order I've talked about the elements of the pomegranate is the order in which it was stitched. Always begin with whatever is in the background (in this case the center and the leaves) and end with what's in the foreground. This is a rule for stitching any element in a design that has parts in the background and foreground.Next time, long and short shading question answered!
