RSN crewelwork Course Day 5 - Long and short shading
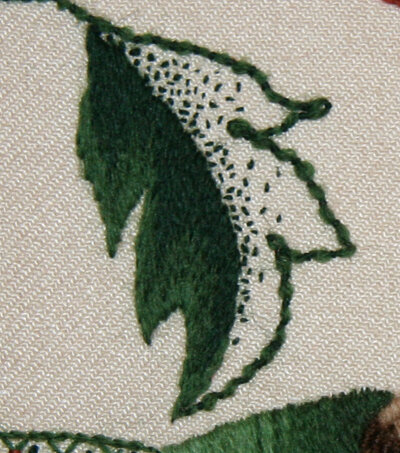
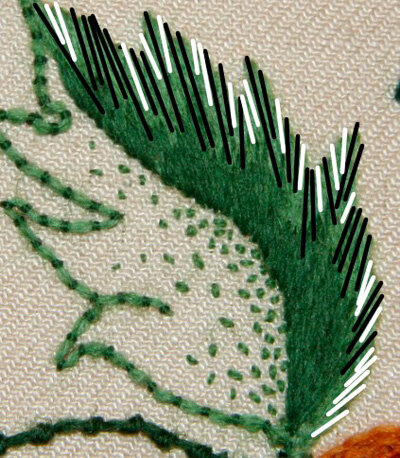
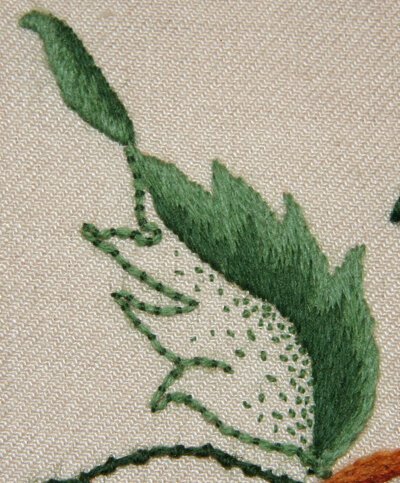
Long and short shading seems to be one of the stitches that all of us struggle with: some of us figure it out easily and others take loads of practice. I was leaning more towards the loads of practice side but now I think I've cracked it. Many of you asked questions about long and short shading so today I will pass on what I learned at the course, using the examples from my crewelwork to illustrate my explanations. One of the questions submitted by a reader was "How do you move the stitch direction around your shape?"The easiest thing to remember is that generally (not always, but generally) the short stitches move around the direction of the shape and the long stitches act as a breaking point between the sections that change direction. Together they give a smooth surface.Here is an example showing you the short stitches in white and the longer stitches in black. Note that the short stitches are not the same short length and the long stitches are also not all the same length. So often an illustration gives us the idea that all the stitches are only two lengths - short and long. The stitch length often varies, especially when you're working a complex curved shape.
 Once the first row (which is always the outside row and stitched from the outside in to the middle over an outline of split stitch) is worked, then the other stitches generally follow the same direction and same length. One trick that I learned is that sometimes you will need to add a stitch here and there of a color. We tend to think of long and short shading as being, for example, 3 rows of three colors of long and short stitches. Sometimes adding an extra stitch in, say, the second row helps to blend the second and third row better. Use your eye and think of your needle as a paint brush. For great diagrams of long and short shading, look at Trish Burr's Long and Short Stitch Embroidery: A Collection of Flowers.
 "Are there any hidden gems that can help?" Absolutely! Draw your stitch direction inside the shape with a light pencil line and then follow them. Keep your eyes on the lines you've drawn as you stitch. Don't crowd your stitches - give them room to breathe.The next question was about the length of stitch and how much of the shape should one fill with the first row of stitching.With the first row of stitches you want to fill one third to one half of the shape. It's better to go deeper into the shape than you think because you will come up in the middle of that first row and if it isn't deep enough you'll be limited as to where you can come up. This will affect the smoothness of your stitching. You don't want to be forced in to come up in a place that isn't perfect because the first row is too short and you have to make sure you cover the fabric.Longer stitches will make the shape look smoother but sometimes that's not what you want - as in the case of animal fur. On the very last day of the course I had only the deer left to stitch, I naively thought it wouldn't take long and that, since I felt confident about long and short shading, it wouldn't be too difficult. Ha!My best advice is to practice and to study photographs of long and short shading wherever you can find them. Look at them as diagrams rather than as art: maybe even make a photo copy and draw the stitch direction lines over the picture. It's a stitch that looks beautiful and gives an embroiderer so much pleasure when you can get it right.A gentle reminder; if you're interested in long distance from the RSN, don't forget to contact them.
