
Trevelyon's Gold Cap : leaves and flower completed
Before I begin to tell you about the progress on Trevelyon's Gold Cap, I want to welcome the influx of new readers to The Unbroken Thread! I'm currently on holiday in the USA visiting family and friends, so my posts will be not as frequent, but be assured they will pick up again when I return home. There are a few exciting things for me - and therefore for you! - on the horizon this autumn!Trevelyon's Gold Cap is a project I'm working on, based on a design by Thomas Trevelyon found in his Miscellany of 1608. His book contains historical information, a timeline, drawings, and, most importantly for us, embroidery patterns.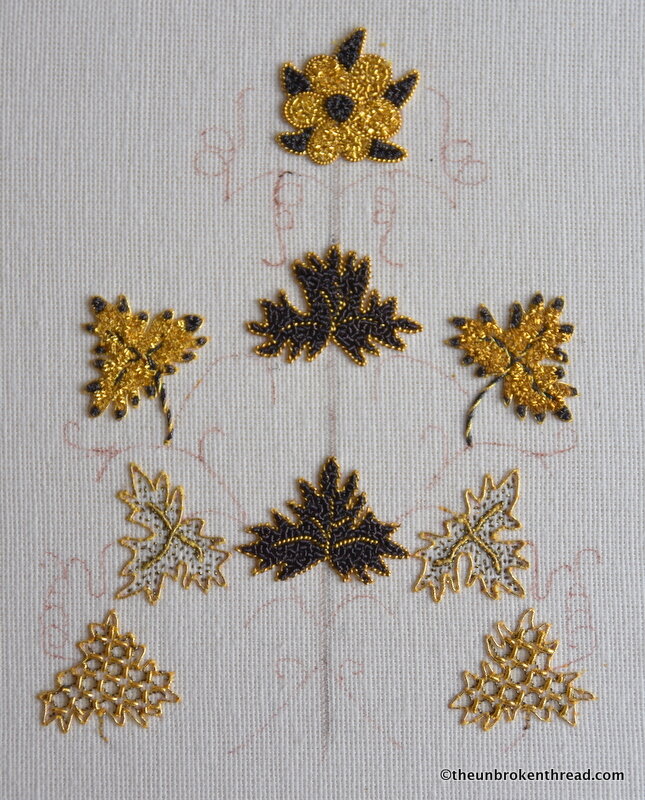 I cleaned up the pattern and then traced it onto the fabric. I didn't include the grape clusters because those will be worked in spangles and an outline isn't necessary.Normally I would begin with the laid work, which is passing thread and twist in this design. The laid threads are couched down and are far less likely to be damaged in the course of working on the piece than the check and purl threads I've used in the leaves. However, this is one panel and a "test" or prototype for the complete cap and I needed to see what the leaves would look like before I added the laid threads.
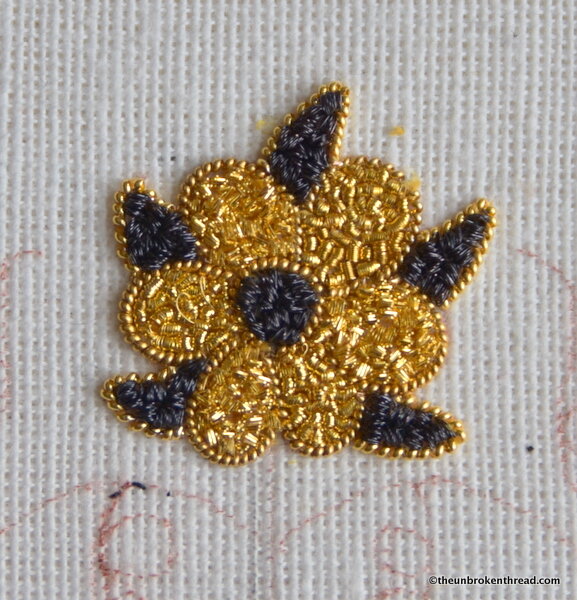 Each of the little motifs is outlined in either stretch purl pearl or passing thread. This flower - which looks much like a Tudor Rose - is outlined in purl pearl. The filling is either gold purl or gold check in the petals and black purl in the outer leaves.If you look closely you can see the subtle difference n the way the light reflects off the check and the purl. The check thread is more sparkly, while the purl thread is shiny. The technique is the same for attaching the threads to the fabric.
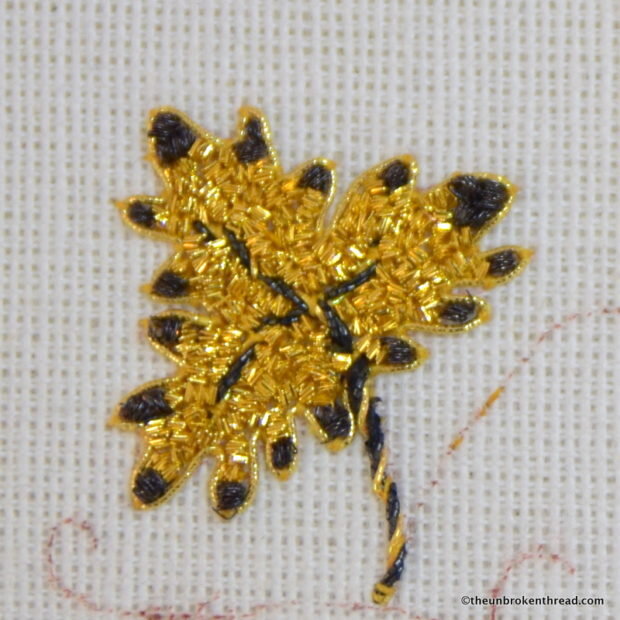 In the leaf above I've used gold and black check thread together. The black tips use only one or two tiny pieces of check. Before stitching down the check, the twist must be laid first for the veins, then the check goes in.
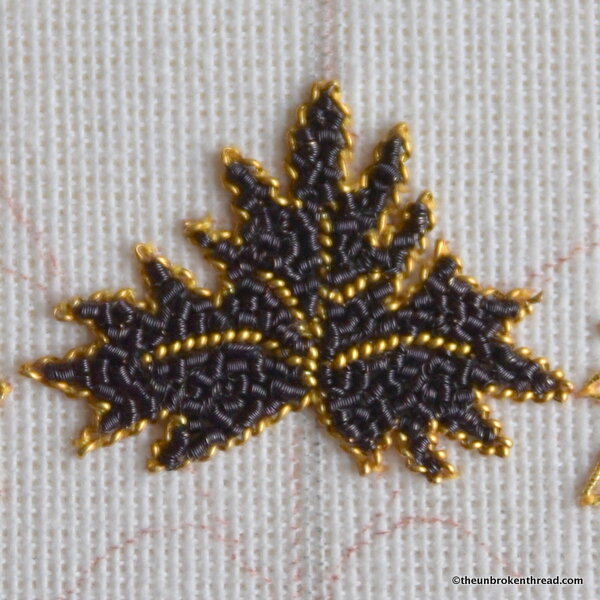 In the leaf above, the outline is stretched purl pearl and is the vein. Because the leaves are so small, I've overstretched the purl pearl so it would go around the tiny bends of the leaf. The leaf is filled with matt, black purl, which is just about my favorite thread for this project!
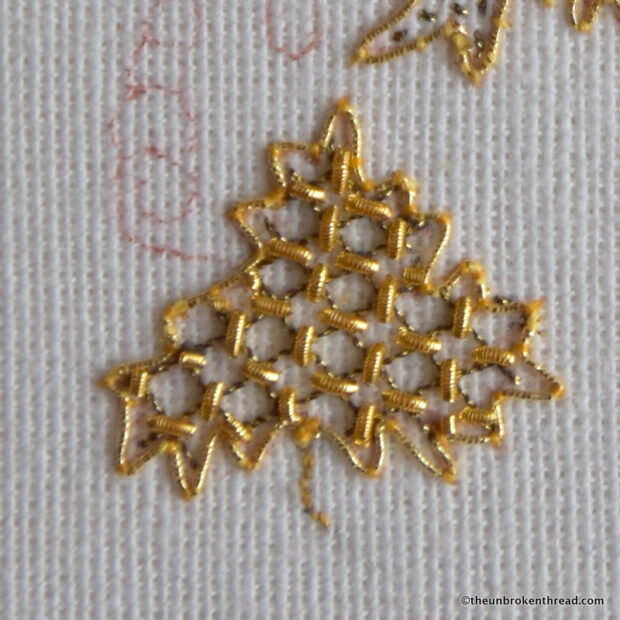 The leaf above is outlined in passing thread and the trellis is DMC Diamante. I've then cut very short pieces or purl and laid them over the trellis.
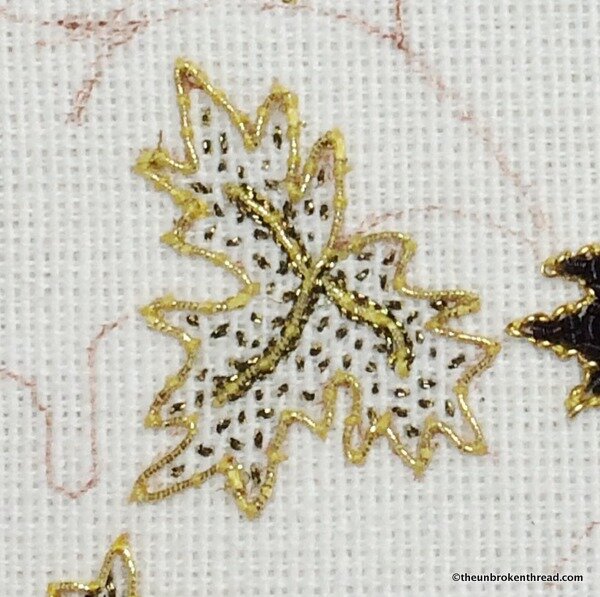 The leaf in the photo above is, again, outlined in passing thread and the vein is also passing thread. The seeding and the stitching along the vein are in the DMC Diamante thread.What was fun about working out all the different leaf designs was choosing the thread and the technique. What was difficult was finding a technique that worked successfully in a small space.Now that all the leaves and the flower are finished and I'm happy with them, it's time to add what I would have done first if stitching this piece the "correct" way: the passing thread and the twist.
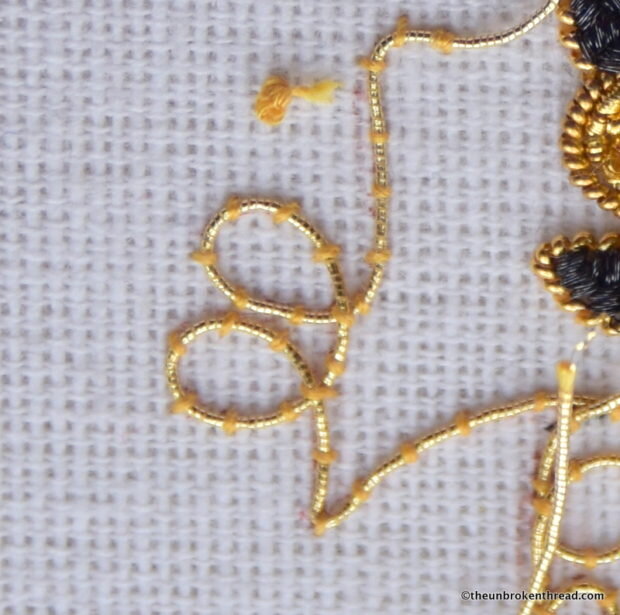 To ensure that the purl and check threads weren't damaged, I covered everything I'd completed with tissue and was very careful never to rest my arm on the embroidery. I'm always careful, but in this instance I was VERY careful! Couching down the passing thread on the curlicues wasn't difficult and took about an hour and a half.
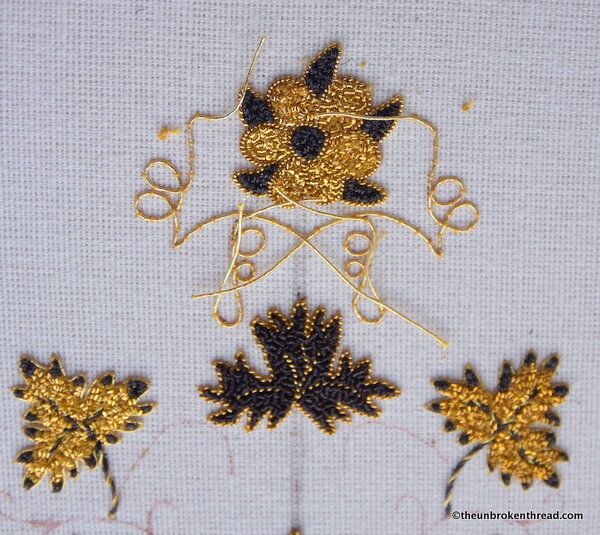 Next time I'll have some of the twist for the main stem put in and then we'll ALL have a better idea of what the finished piece will look like!