Loveday Crewelwork: Little brown sparrow!
Every once in a while I notice that what I've done just isn't right. Usually, when doing crewelwork, I work chain stitch, I work from the beginning to the end of the design element. So, in the photos below, I worked the first row and a half of chain stitch from the point where the tail comes out of the bird's body towards the tip of the tail.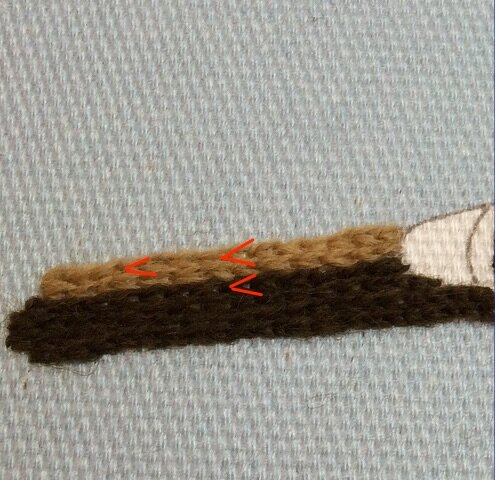 As I was stitching away, I looked down and noticed that his tail didn't look like feathers at all. In fact, it looked just weird. It took a few moments and then it hit me - the stitches were going the wrong way! How can chain stitch go the wrong way, I thought. For a few minutes I just sat and looked at what I'd stitched. Ahhhh...the stitches were supposed to be feathers and feathers do not grow from a thin point to a thick end - they grow from a thick end to a thin point. The shape of each chain stitch was backwards in comparison to how feathers grow on a bird.Each chain stitch begins with the needle coming up and going back down at the same point. The next stitch anchors the loop created by the previous stitch so the shape of the stitch is a point at the beginning of the stitch and a wide loop at the end of the stitch. Translating this into feathers meant that the "pointed" end of the chain stitch should be pointing towards the back of the tail and the curved, wider end of the stitch should be pointing toward the body of the bird. Once I'd changed it around, it looked so much better!In the photo above you can see the stitches done "correctly" and I've drawn red "V" shapes to highlight what I saw. Do you agree?
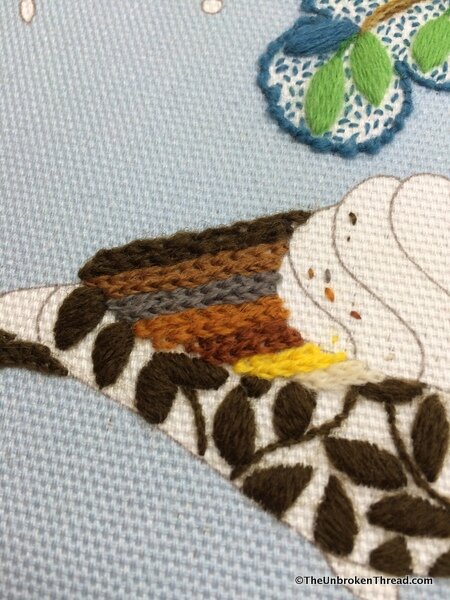 Once I'd figured out what was bothering me, it was fun to do the feather at the end of the little sparrow. Aren't the colors just beautiful? I'm not naturally attracted to browns, but with the grey and the yellow, they look so rich.
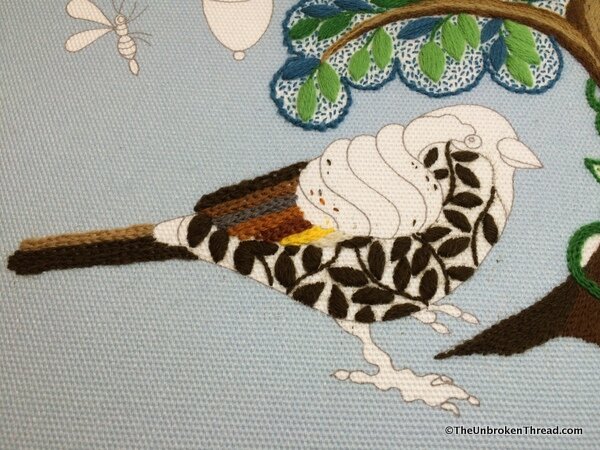 As in the blackbird, part of the body is filled with satin stitched leaf shapes, this time connected with stem stitch stems. Next time you see our little sparrow, he will have seeding all around the leaf shapes.
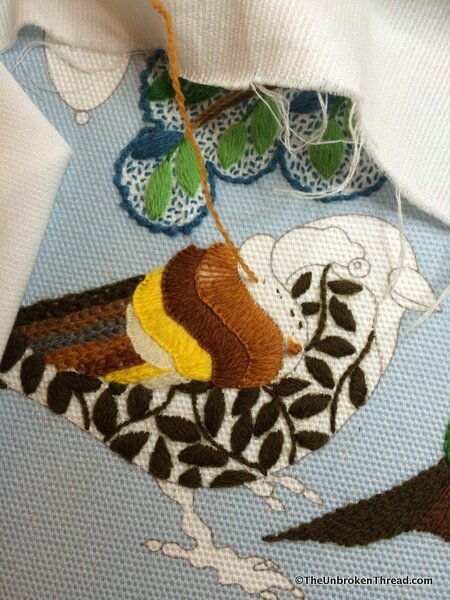 Next up was the wing and it's worked in buttonhole stitch in five different colors - white, yellow, rusty brown, orangey brown and medium brown. Whenever I stitch a curved shape in buttonhole stitch, I struggle to fill the area completely without adding what I call "filling stitches". Because I want to keep the ruffled edge pretty, squashing the stitches together to completely cover the area doesn't work very well. My solution is to embroider the area with buttonhole stitch first, making sure the stitches are evenly spaced and at the right angle. I then go back and fill in with straight stitches, making sure the end of each stitch is tucked under the buttonhole border.
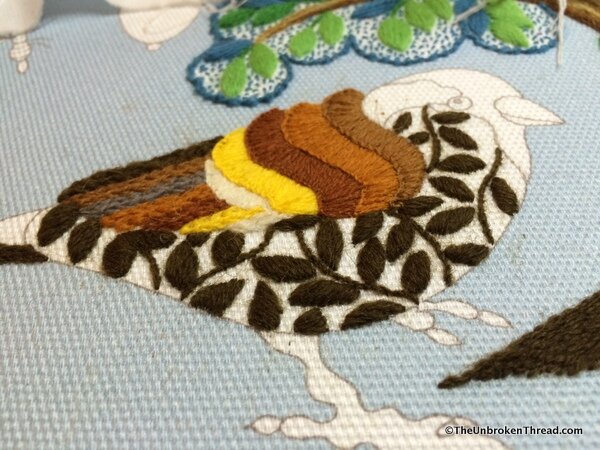 As you can see in the photo above, this trick seems to work rather well!What do you do to fill buttonhole stitch without making it looked squashed? Maybe your idea is far better than mine and I'd love to know your trick!