
Loveday crewelwork - Tri-color leaf 2
I've just finished one of the prettiest crewelwork leaves I've ever stitched. The choice of stitches and the combination of colors makes it bright and fresh. It's one of the leaves on Nicola Jarvis' Loveday crewelwork design.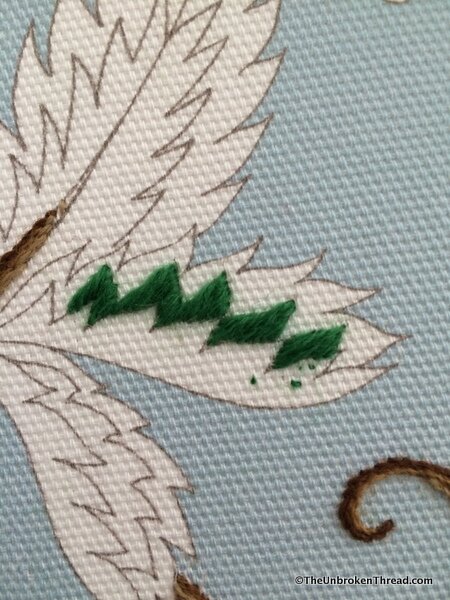 As you can see in the photo below, each section of the large leaf is divided into three parts, each with a jagged edge. As usual I worked from the part of the leaf in the background (farthest away from the viewer) towards the part that is in the foreground EXCEPT this time I waited to stitch the one in the background last because I knew the edging stitch on that leaf (you will see this later) could get totally messed up as I was stitching the other two sections.The center and bottom sections of each leaf are worked in satin stitch. I always outline any shape I'm stitching in satin stitch with a split stitch first. I have had absolutely zero luck creating a beautiful, smooth satin stitch without outlining the shape in split stitch first. ZERO.
 You can see my split stitch is as tiny and as even as I can make it. To maintain the precise shape of the leaf I stitched just inside the line rather than on top of the line. It's amazing how that small amount can take the sharp edge off points and flatten curves.When working satin stitch in a shape with a slanted edge, it's best to determine the direction of all the stitches before you begin. Use your piece of wool and hold it at an angle in one place in the shape, then without changing the angle, move the wool up and down the shape to see if maintaining that angle as you stitch will result in mostly parallel stitches across the entire shape. You won't be able to do it 100% of the time, but as long as the angle of the satin stitch doesn't change dramatically you should be pleased with the result.
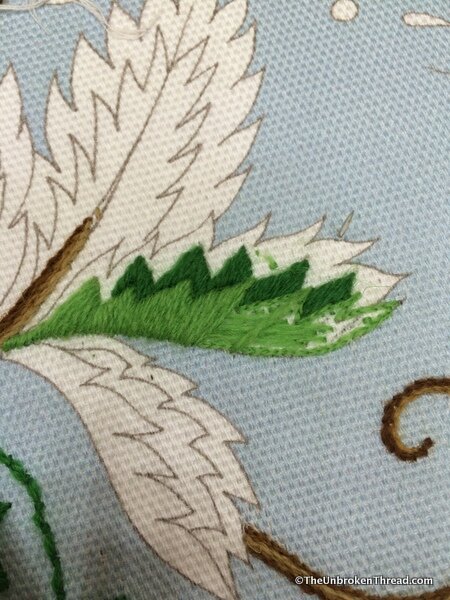 Generally I find that the stitches look best if the stitch runs from the base to the tip. You can see in the photo above that I've put in that stitch (base to tip) first and then will add the rest of the stitches on either side.I also draw stitch direction lines inside the shape after I've done the thread test mentioned above so I stay on track. It's all too easy to change the angle as you stitch and suddenly find your stitches going in completely the wrong direction!
 After all of the satin stitch areas of the leaves were finished, I could move onto the part of the leaf that is farthest away - the opposite of what I would usually do! Firstly, I added lots and lots of tiny seeding stitches, scattered like chicken feed all over the area of the leaf. For the best results I find that ensuring each stitch is the same length looks best.
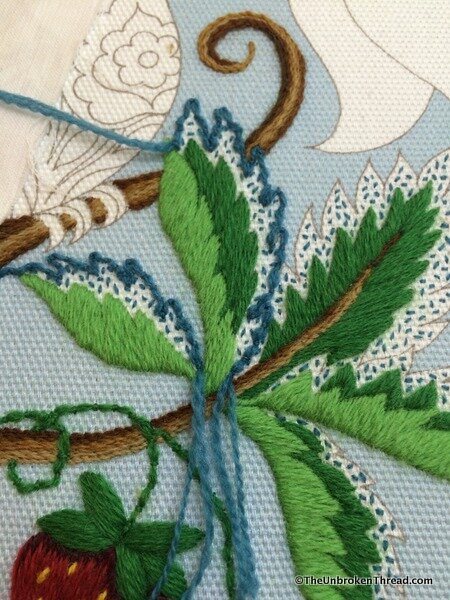 Lastly, a double wool thread was couched down all around the edge of the leaf. Again, keeping an equal distance between each couching stitch and an equal amount of "poof" in the laid thread makes it look very pretty. Pulling the laid thread tightly does not give the ruffled effect you see here.
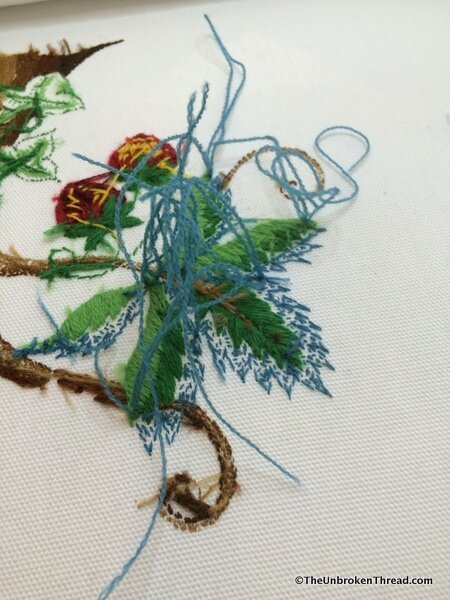 As I worked around the edge of the leaves, there were places where the line stopped and then continued on the other side of a part of the leaf. Rather than finish my thread and begin again, I threaded a needle with the double piece of wool and took it under the fabric, bringing it up again where the laid thread started again. It did cause a bit of a mess on the back but saved me time and thread!
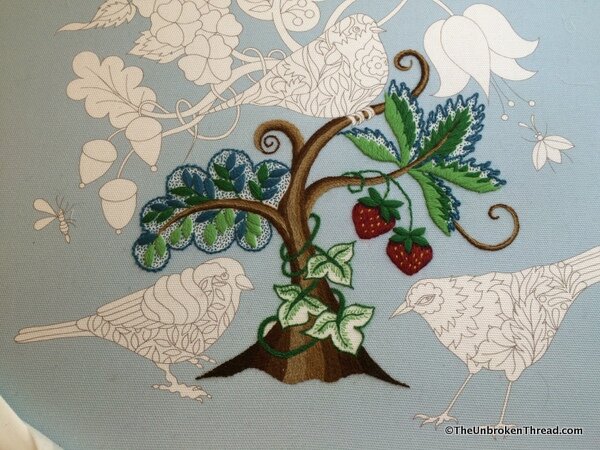 Both of the large leaves in this piece are so pretty but the one I wrote about today - on the right - is my favourite. What about you?