
Loveday crewelwork- sweet strawberries
The two large strawberries at the bottom of the tree are worked in padded long and short shading. Now, before you ask me what padded long and short shading is, take a deep breath and think about it. It's a padded satin stitch but shaded, using longer and shorter stitches to blend the colors together. Padded long and short shading.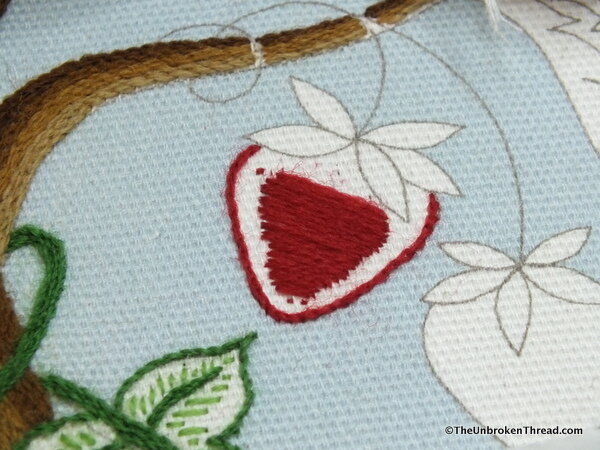 Whenever I'm doing any satin stitch motif I always, always outline the shape with split stitch - usually very tiny split stitches so I can get around the curves of the shape as accurately as possible. I learned a long time ago that skipping this step means that the satin stitch won't sit as smoothly as I'd like and I have a real soft spot for super smooth beautifully flat satin stitch.The next step is to pad the area with straight stitches. In this case I only did one layer of padding. When padding a shape you always want to have the last layer of padding - the one directly under the sating stitch - going perpendicular to the final satin stitch layer. I don't always stitch the padding stitch right up to the edge of the shape, especially in the case of strawberries when I want them to look round and fat.
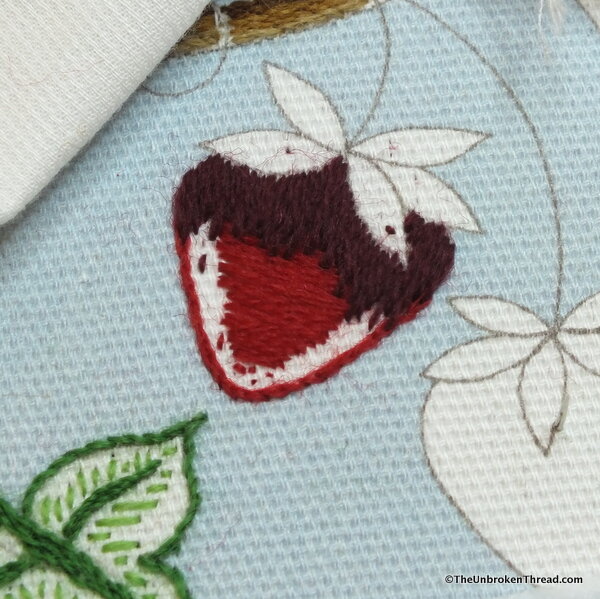 To get the shadow from the leaves on the top of the strawberry, I began the long and short shading with the darker of the two red threads. Remember to bring down the first row of threads when doing long and short shading well down into the shape. You can always cover the first row up as much as you need to with the second row. If the first row is too shallow you're not going to get a good blend with the second color.
 The first row of dark red thread went up through the top area of the padding. The second row of long and short shading, worked in a bright red, came up through two layers of stitching - the padding and the first layer of long and short shading. To get the little bit of dark red shading on the bottom of the strawberry, I added dark red threads at the outside edges of the third row of L&S shading, bringing the dark red threads down over the split stitch outline.
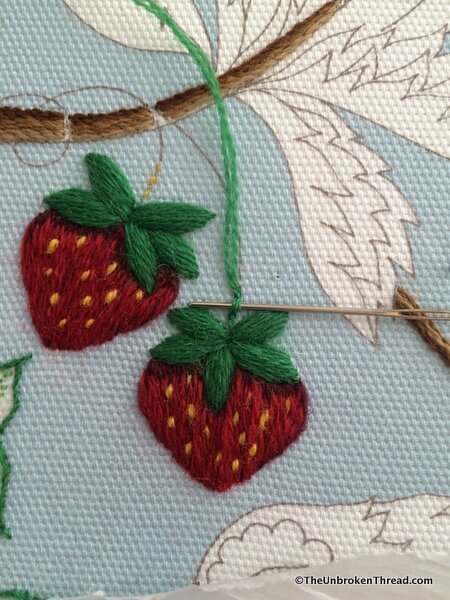 Then I did something a bit unorthodox but it worked! I stitched the fourth row of L&S shading as usual, except I brought the bright red thread up through the third row and down through the third row on the ends, so a tiny bit of the dark red showed through. If you look really closely at the right strawberry in the photo above you can see that little bit of dark red peeking through. It isn't strictly long and short shading I suppose, but it worked! The finishing touches to each strawberry are the tiny yellow straight stitches snuggling down into the strawberry.The leaves of each strawberry are worked in padded satin stitch and went very quickly. The stem is done using one of my favourite techniques - a couched double thread. Using a double thread on the line of the stem, I couched them down using a single thread with little stitches about ¼ inch apart.
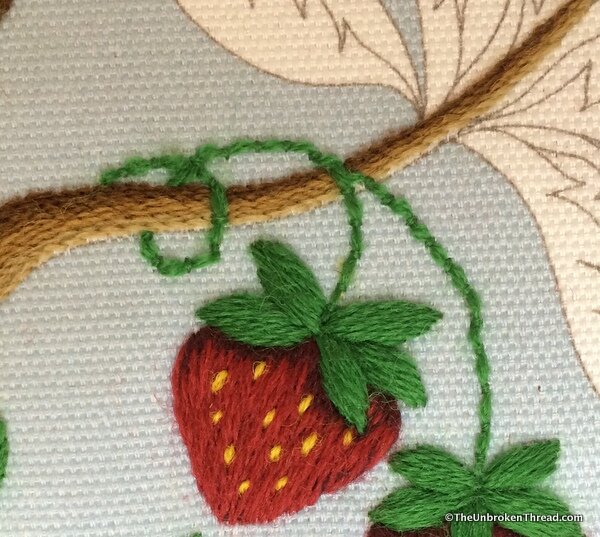 I think the couched thread looks so pretty if it isn't pulled tightly so it ruffles slightly. One of the best ways I've found to do this is to use a fat, blunt needle slid under the double thread to make sure I don't pull it too tightly as I stitch. If I forget and begin to tug too hard as I'm going along, I can always go back and use the blunt end of the needle to gently pull the thread into a little bump.
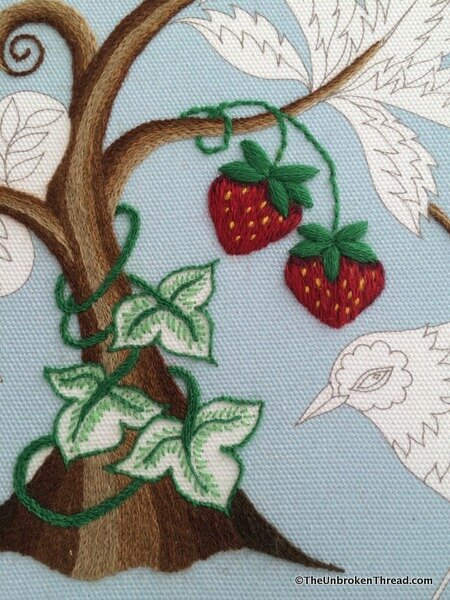 Doesn't it look pretty? It makes me long for summer strawberries and the warm sun!