
A turned under petal - silk shading the shade!
The next petal in my order of work was the turned under petal on the lower right side of the flower. The top of the petal is bright white in the photo, which was relatively straightforward to stitch.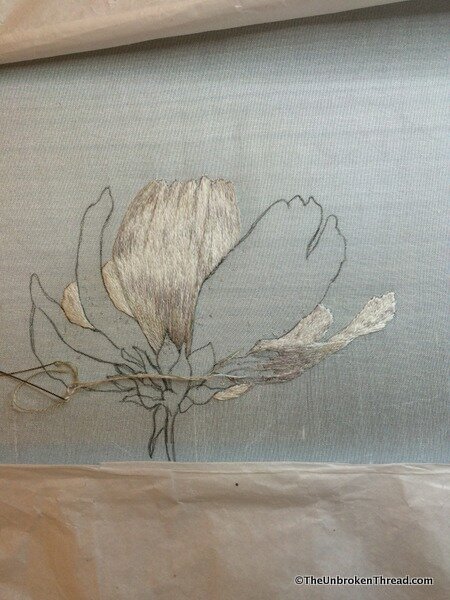 However, when I moved onto the underside of the petal that's in the shade, the colors became quite muddy and very difficult for me to work out. I could see in the photo the different shades and I used the thread matching trick Kelley taught me of holding the thread 4 inches away from the photo to see if the thread disappeared into the photo - if it does, it's the right color. There are so many shades and they change so quickly in this part of the photo it was a real challenge!
 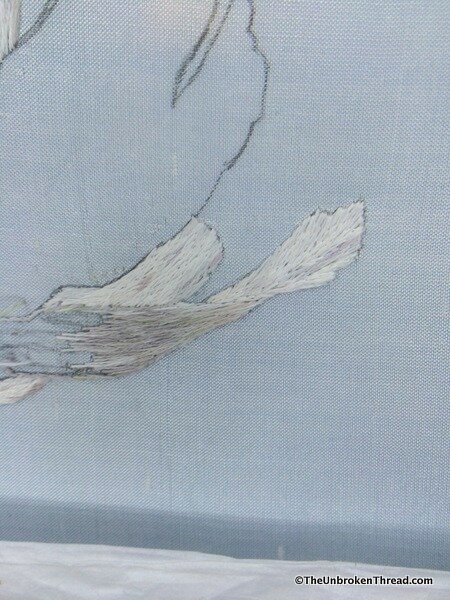 You can see the tip of the petal is stitched in white, bright white and a tiny bit of pale violet. Now look at the underside: can you see the light muddy grey, the violet, the dark and light grey and the whites? Blending it was really tricky and, at the end, I wasn't very happy with it. When I stood up and moved away, the whole thing was too dark, too grey.
 Fortunately, it's not too difficult to go back and insert a few white threads into the mix which brightens it up beautifully! The trick to doing that is to bring your thread up at an acute angle to the fabric - kind of sneaking the thread in- and find a spot where the threads can be easily split when you take the thread back down. This way the thread nestles into what has been stitches and there aren't any holes or dents.Next time I'll be able to show you the whole white part of the flower finished. There are a few things I need to ask Kelley about once I get back to her studio in Bristol and then I'll begin on the sepals and the stem!Do you have any tips and tricks for adding or changing the color in silk shading when it isn't quite right? Let us know!