
Crewelwork Robin for Loveday
The crewelwork, red breasted robin is directly in the middle of the Loveday tree. Sitting proudly with his bright red and orange breast all puffed up, he's a real show stopper!Of course, the red breast is the part of the robin everyone will glance first so I wanted to stitch it as beautifully as possible.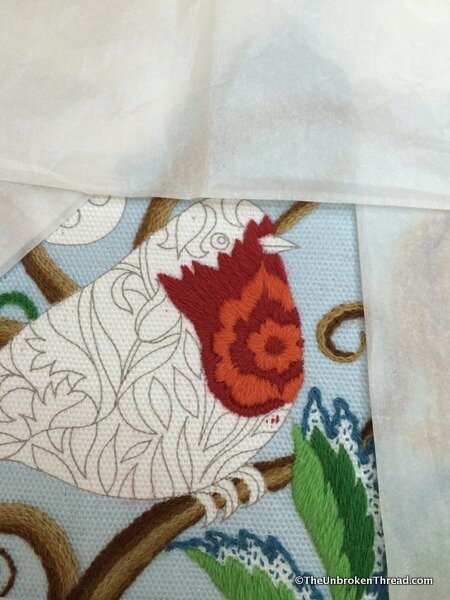 I decided to place all my stitches 'pointing' to the center red dot, accentuating the concentric design. As always, I outlined each part of the motif with split stitch. I really think my satin stitch looks better when the edges are defined with split stitch. As I worked each ring of the breast, I had to tuck the beginning of some stitches behind the one next to it.This means that, at the beginning of the stitch, my needle would come up on the inside of the circle, just underneath the previous stitch and, at the end of the stitch, the needle go back down directly next to that previous stitch on the outside. By hiding the beginning of the stitch underneath the previous stitch I could accommodate the greater diameter on the outside without squeezing the stitch on the inside of the circle.
 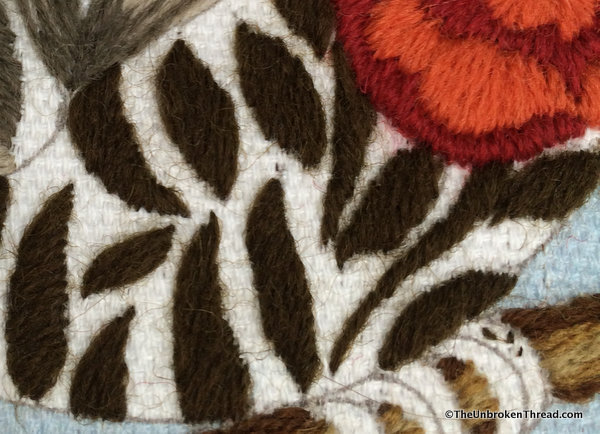 On the outside of the outermost circle the stitches got very small (see in the photo above). The trick here is not to crowd your stitches. Give the thread room to expand to fill the space, smoothing it down if necessary with your laying tool a little. Crowding the stitch will fill the space but it also prevents the thread from laying flat and produces an uneven surface.
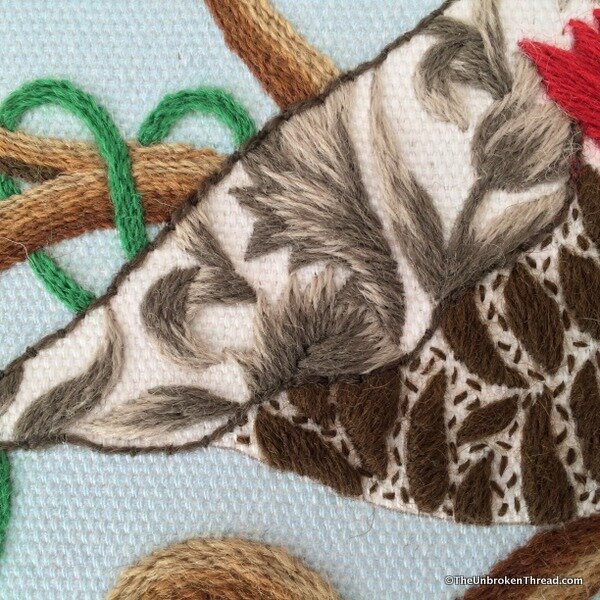 The bottom of the robin is worked in the same way as the sparrow. Each of the small, dark brown areas is done with slanted satin stitch and the spaces in between filled with tiny seeding stitches.The feathers at the top of the robin are worked in long and short shading and, I admit, this was the most fun. To work these small areas using shaded stitches, I filled just about all of the shape first with the lighter color of taupe. Then I had the freedom to put the darker stitches where I wanted them to be without worrying about a gap between the colors. I also used some very, very short stitches to go around the tight curves.
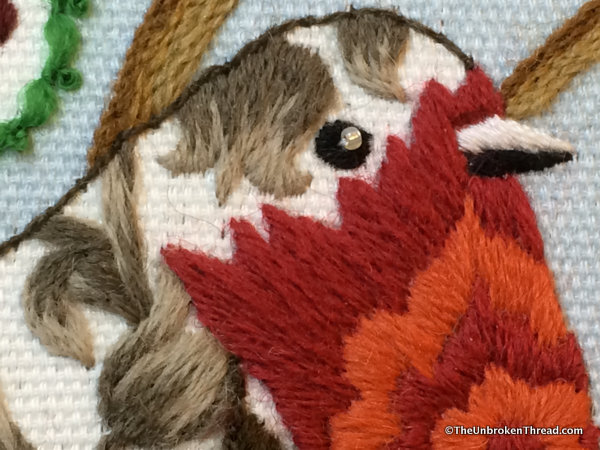 The finishing touches were the eye - complete with a white bead - the beak and the little feet grasping the branch on which he's sitting.
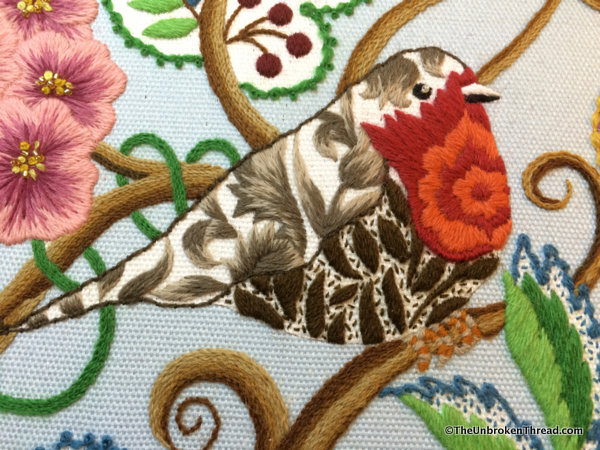 The finish is getting ever closer and next time I'll show you the leaf above our robin's head.