
RSN Silk Shading threads safe and ready to go
Traveling to and from one of the RSN courses is always a bit of a production. It's not like I'll be able to pop home if I forgot something...Berlin is a long way from Bristol! So I always do a few things to make sure my materials and equipment get to and from England safely.For the silk shading course my biggest concern is the silk itself. I have 28 different colors of "Au Ver a Soire" silk for the project. This is a large investment and I want to make sure it stays in perfect condition throughout the entire course including the traveling. When I was in London for the first four days of the RSN Canvaswork course, one of the students had a wonderful idea for keeping her threads accessible and safe when the stitching day was finished. She generously allowed me to take a photo. She'd made a long, narrow pillow which could be laid across the top of the slate frame when she was stitching. The pillow kept the threads from getting tangled since they were resting on fabric and they draped nicely over the pillow. They were visible while she was working and it was easy for her to get the color she needed. At the end of the day - and what you can't see - is the flap of fabric that folds up to cover the threads keeping the safe.Yesterday I made my own version of the same thing using slightly different materials* (see note below)
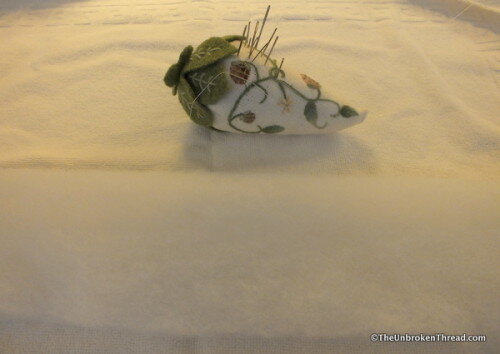 I started with an old, rather thin cotton bath mat. The length was just right for the three thread holders and, folded along with a bit of left over quilt batting, it was the right thickness.
 After I had folded it and made sure it was the correct length and width, I pinned it and then stitched it together along the edge using large basting stitches.
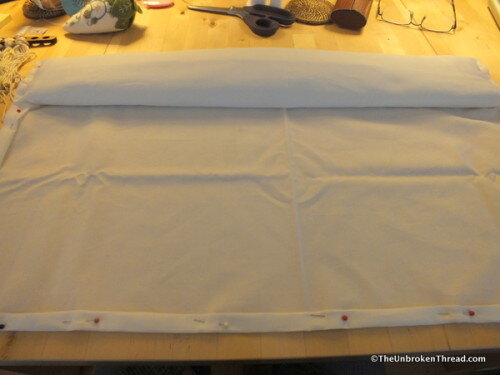 Next I took some of the white cotton fabric I bought years ago that's in my stash. I cut it to the width of the 'cushion' plus a bit more so I could have a hem along each side. Then I stitched it up along the ends and at the front edge of the cushion. I hemmed the sides and the bottom and it was done!
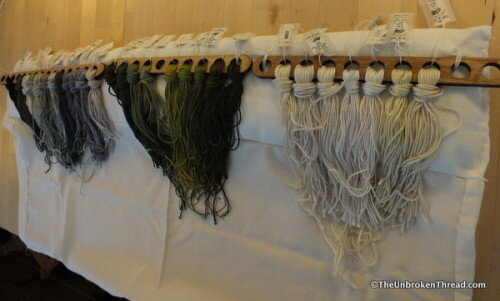 The last step was to lay the thread holders with the thread in them along the length of the pillow and stitch them on using button hole thread. I stitch them loosely so I could get a strand of thread off easily. Below you can see the thread snugly wrapped up in the fabric that extends from the pillow. It will be easy to move from place to place and the thread will stay safe. If it looks like it will unroll, I'll use a couple pieces of ribbon and tie them around to keep it from unrolling.
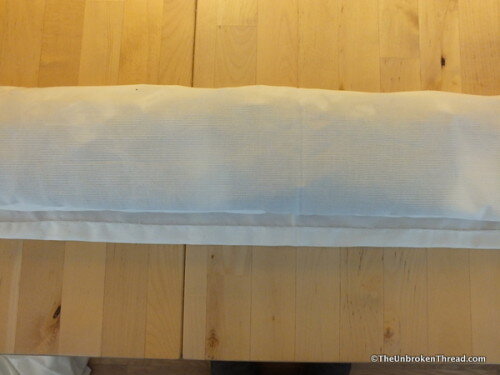 When I arrive at the studio to stitch, I'll unroll it and all my threads will be there safe and sound!
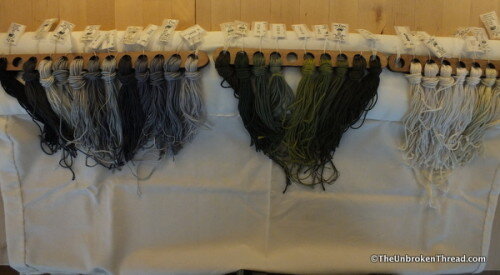 I'll let you know how it works once I start using it!Have you ever made something like this for your threads when you're working on a large project? Share your solution with us!
 *This year I've made a promise to myself the I will not purchase one more thing. I have enough: enough equipment, enough thread, enough fabric, enough of everything, really. Late last year I did order one of the new stands from Just a Thought and I'll be telling you about that when I go back to Iowa for a visit this summer where I had the stand shipped to my parents. I have signed up for a course with Jenny Adin-Christie in August and I think there may be a materials fee for that. Other than those two things you should NOT be hearing about me buying one more thing. If you're interested in how I'm doing buying Not One More Thing (the name of my new blog) take a peek at it here.