Just look at these colors!
The entire left side of the Marriage Pillowe is now finished. The colors that Phillipa Turnbull has chosen for the bottom flower are simply stunning.The center is blue trellis laid work with dark red stitches where the lines cross and down the center is a medium green stem. It's a beautiful combination of rich colors. The petals, though, are where the colors glow on the fabric. All of the petals are worked in long and short shading. The bottom two petals - one on each side - are stitched in four lovely shades of blue.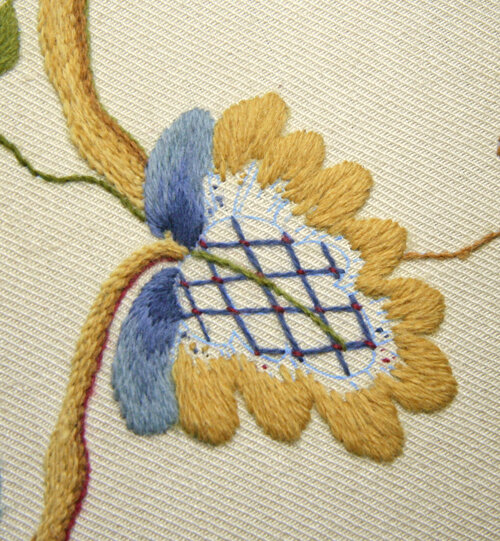 The long and short shading on the remaining petals begins with gold, all stitched in double thread. If you look closely, you will see that the threads don't all lay perfectly next to one another. Using double thread and having to taper the direction of the stitches to go towards the middle of each petal made it necessary to slightly overlap the stitches towards the bottom. Since these areas will be covered with the subsequent rows of color, I didn't worry about it.When I added the second color - green - I didn't place each stitch right next to another one, but instead left a little breathing room between some of them at the top.
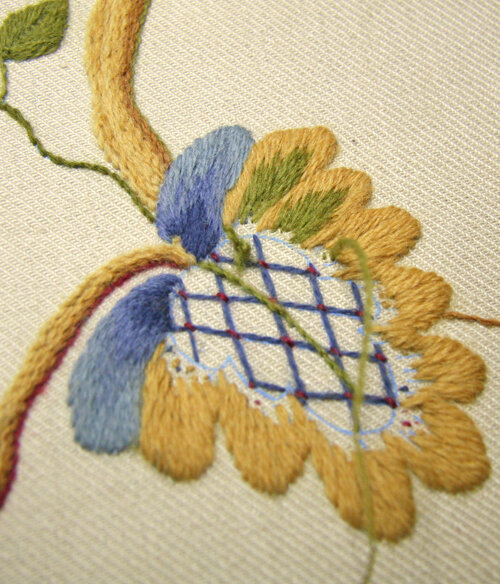 I also didn't make each stitch get progressively shorter as I worked towards the outside of each petal. Some of the outer stitches are a little bit longer than ones towards the inside. This looks more natural to me and keeps the long and short shading from looking too rigid.You can see that I went very deeply into the first layer of gold stitching. In my mind's eye I divided up the height of each petal into four parts and placed the colors so that the petal would be divided into approximately 4 equal parts from top to bottom.
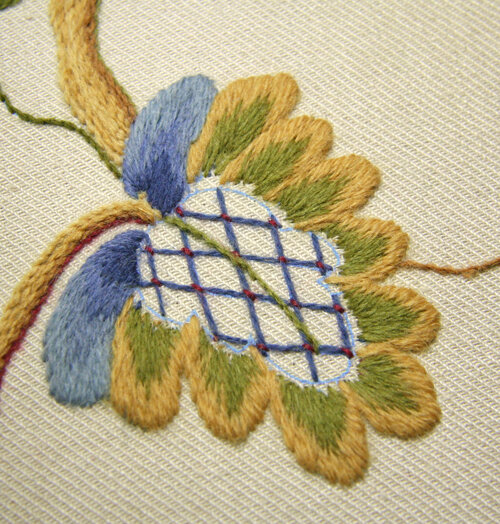 When I added the next two colors, I didn't always place them directly on top of a thread of the previous color but instead placed the thread between two of the stitches of the previous color. This helped the new color blend in better since it gets pulled down between the two threads a little.
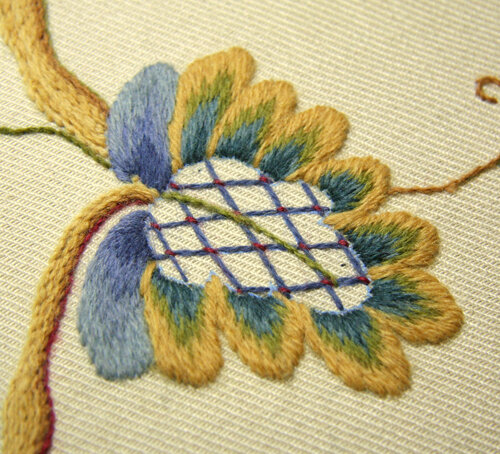 When I was finished with the long and short shading, I had to go back and fill in a few stitches of gold where I hadn't made the edge of the petal go right down to the center of the flower. The last step was to put in an outline of crewel stem stitch on the outside edge of the center.
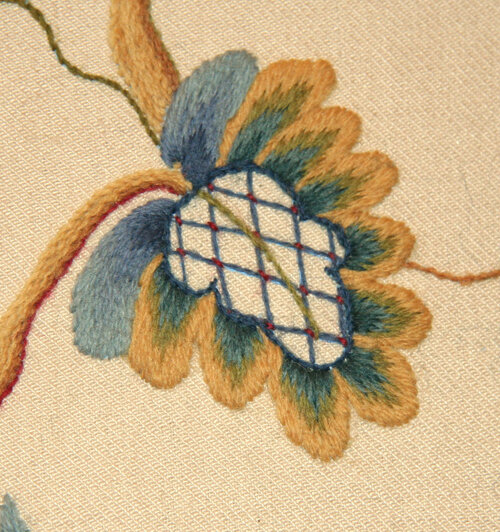 When doing long and short shading with different colors rather than slightly different shades of one color, it's important to change your stitching to accommodate the big difference in color between layers. In my experience (which is limited!), if I add each layer of color varying the stitch length only a little and packing the stitches in tightly, I end up with what looks more like block shading or simply bad long and short stitch. Remember the advice I got from both Tracy Franklin and Nicola Jarvis - think "longer and shorter" not "long and short." The stitches need to be varied in length quite a bit. Packing them in too tightly doesn't allow any of the previous colors to peek through. Give them some breathing room and you'll be much happier with the results.
