Tricks for a smooth, curved button hole border
Whenever it's time for me to work an area in button hole stitch, I always have to look again at my trusty Embroidery Stitch Bible to remember how to get started. It's just one of those stitches that I can't quite remember how to do. Once I get started, it's no problem ... except when I'm stitching around a curve and the stitches need to be closely worked so they resemble satin stitch. Then I have to use a few tricks to get a finish I'm happy with.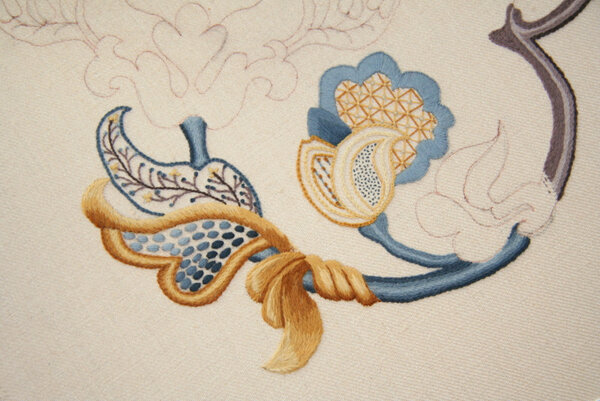 When worked with the stitches close to one another, buttonhole stitch looks smooth like satin stitch but has a delightful border on one edge: it looks a bit like stem stitch or outline stitch. The button hole stitches look best if they are side by side but not overcrowded or overlapping one another.One of the best tricks to help the stitches be evenly spaced on a curve is to begin from the center of the area and work towards one side. Then begin at the center again and work towards the other side. This prevents the stitches from becoming too slanted as the stitches go around the curve. It looks best if the stitches stay perpendicular to the outline of the shape rather than falling over into an angle as they move around the curved shape.
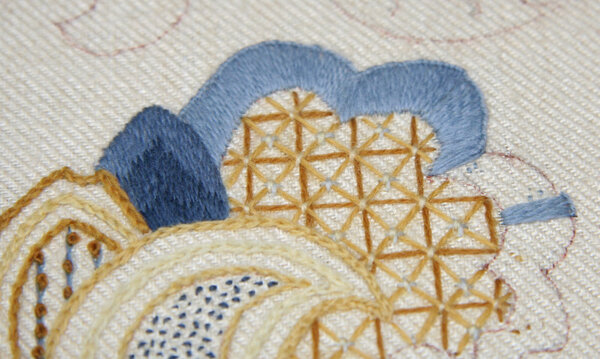 When the curve is tight, I sometimes begin 1/3 of the way into the curve on one side and go to the edge, begin 1/3 of the way in on the other side and go to the edge and then do the middle last. A trick for making sure the edging of the buttonhole stitch is consistent is to place the last stitch of each section in exactly the same place when you finish a section as you would if you were continuing onward. When it is time to join two sections together, be sure to come up right next to the previous stitch so there isn't a gap between the sections.
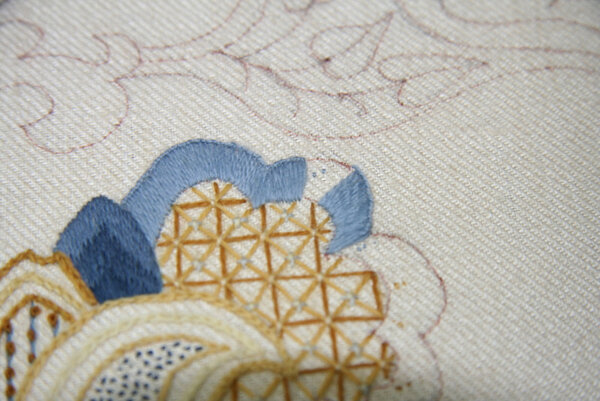 When working connected curves as there are in this design, it helps to do most but not all of each curved section, leaving the small pie shaped area where the two sections meet to be filled in later (see below). As you work around the curve, the stitches at the bottom have to get closer together and the ones at the top farther apart. Two things happen as you go around the curve this way: first, there will be very small gaps between the stitches at the top nearest to the border and second, there will be a gap where the two curved sections meet that you can't fill with buttonhole stitch because there isn't room for the stitches along the top.
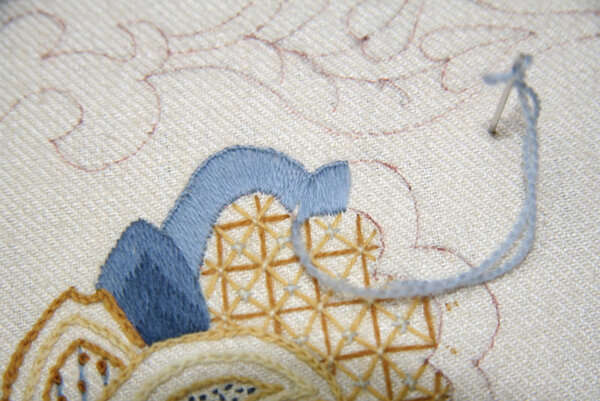 To solve the first problem - filling the little gaps between individual stitches - I simply add a few straight stitches between each buttonhole stitch. I am always careful to insert the needle into the top of a buttonhole stitch using the hole that's there so it blends.The second problem takes longer but isn't any more difficult. Where the two curved sections meet and there is a wedge shaped gap I stitch button hole all the way until the top borders meet and then carefully work short, straight stitches into the wedge section. A few of the stitches can be the full length of the wedge (again using the existing holes created by the button hole stitches) but other stitches will need to be shorter. The ends of these short stitches need to be hidden under the longer ones so you can't see where the needle goes into the fabric. Insert your needle just slightly under the stitch next to where you are filling the gap and make the stitch as long as possible.
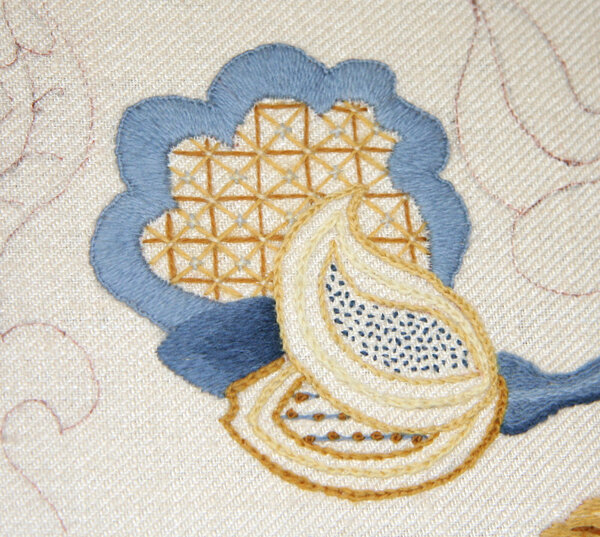 When filling the tiny gaps or the wedge shaped areas, work slowly, one careful stitch at a time. Place each stitch, stop, look at the angle/direction of the stitch and check to see if it has blended into the stitches that are there. If it isn't right, gently and slowly pull it out and do it again. Even tension is important both at the top edge and the bottom. A laying tool can help to nudge a stitch into place if it's slightly off.The buttonhole stitch you see here isn't yet perfect, but it 100% better than I've done before. Partly this is due to practice and feeling more comfortable with my needle every day. It's also because I wasn't afraid to use straight stitches to fill the gaps. In the past I kept trying to make buttonhole stitch do what it can't do - go around curves without getting squished together or leave gaps. If the outside edge/border is smooth and even and the bottom stitches are all even, then filling in the gaps won't be noticed if you're careful.
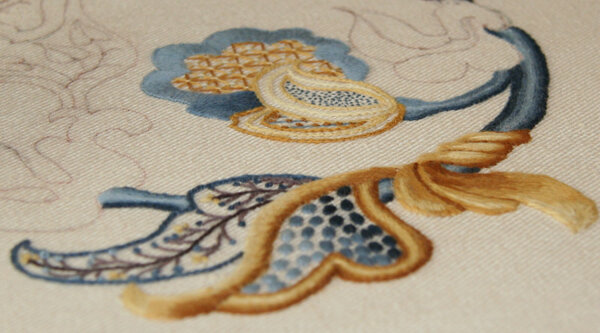 Do any of you have tips for making this stitch work easily around curves or in edging difficult shapes? Please share them with us - we're all looking for ways to make our work more beautiful!
