RSN Preparation Sampler - first update
Doing the different stitches on this sampler in preparation for the RSN Crewelwork course has been really good for me. It's been the perfect way to remind myself of how to do each stitch. It also gave me the opportunity to look at different books and videos to read and hear all the different ways each stitch is explained. Teachers know that there often need to be as many explanations as there are students. Each brain understands a little bit differently so having a deep and broad understanding of what is being taught is critical. The more you know your subject, the more varied your explanations can be. As I worked on these stitches - most of them ones I already use - I took time to read instructions for working them in the different books I have. What's been the most interesting to me thus far is that no single book has been the "best" at explaining. Watching the videos from Mary Corbet's Needle'nthread web site is wonderful since one can see what she's doing as she explains.The sampler is worked on linen twill using 4 shades of Appleton wool : 747, 745, 743 and 741. These are the same materials we will be using during the RSN course.As I worked each stitch, I strove to make them as close to perfect as I could. What do I mean by perfect? Each stitch the same length, the same tension, evenly spaced, covering completely the drawn pattern. Uniformity. Looking at the sampler I was relatively pleased with my results. Looking at these photographs - which of course are larger than the naked eye would see them - I am not as happy. Remember, I'm looking at my work they way a very particular teacher might look at it.Before I go on, I should explain that I worked each of the line stitches from left to right on the bottom and from left to right on the top by turning the frame 180 degrees. My reasoning was to be able to look at the results in a fresh way. Sometimes looking at something upside down or in a mirror allows us to see it more clearly.
 Above is stem stitch, one of the most common stitches in crewelwork. Most of my stitches are the same length, tension, spacing etc. The angle of each stitch is not always uniform and that's something I need to improve.
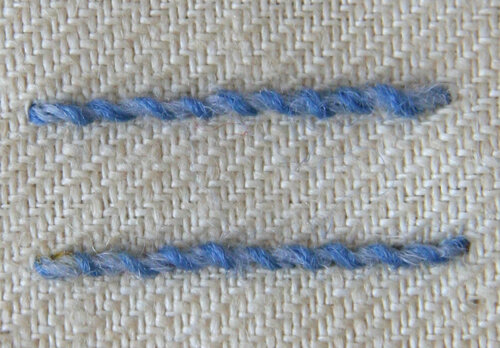 Whipped stem stitch is also one I'm pretty happy with. The whipped stitch is quite uniform both in angle and in tension.
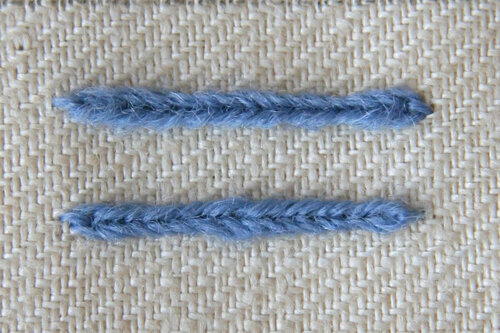 This is heavy chain stitch and is a new stitch for me. I don't know why I waited to use it because I liked working the stitch and love how it looks! You can see that the tension isn't uniform - the bottom line of stitching bulges slightly in the middle and the top line is fatter at the ends than in the middle. Needs work.
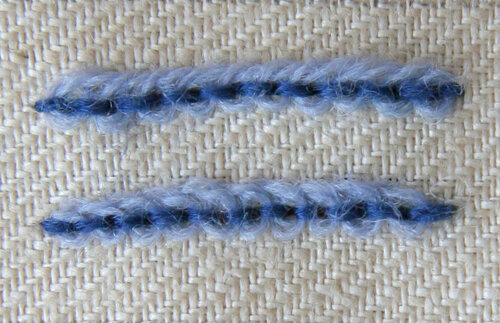 This is Pekinese stitch, which I've used before and like to do but absolutely need my magnifying lamp to work! It was called blind stitch in the distant past. The back stitches are very uniform but the loops in the bottom row of stitching are not uniform at all: they look a bit like a wave coming to shore!
 Above is whipped back stitch. Whenever I use this stitch I think of how much it looks like a candy cane of an old fashioned barber's pole. The back stitches seem fine but the whipped stitches are of a different tension, especially in the top row. I must admit I did this part of the sampler while I was listening to a lecture on Early Modern England from Yale University and was not completely focused on my work!
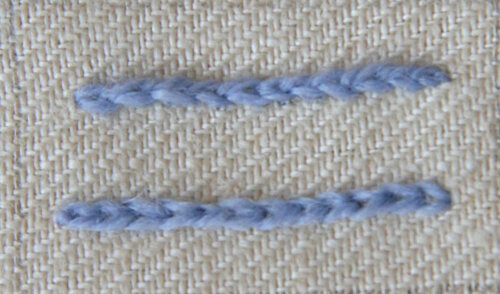 The chain stitch was also not my very best effort. Again, I can blame the lecture as a distraction. But really, I am just a bit sloppy. The stitches in the bottom row on the left are fine but the top row is a mess.
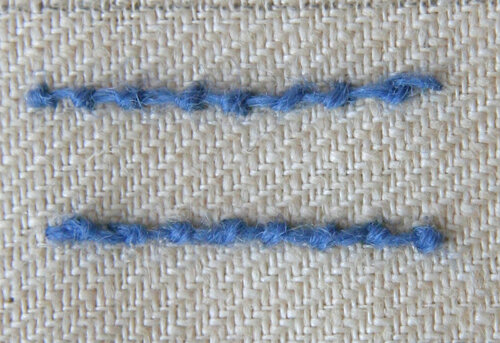 Coral stitch is fun to do and that little knot makes a great texture in the line. The spacing here is good, the tension is pretty even but I didn't really stitch a very straight line. I found the most difficult thing was to stitch any of these lines straight. All of the above stitches are outline stitches and, thank goodness, are more often than not used on curved rather than straight lines!
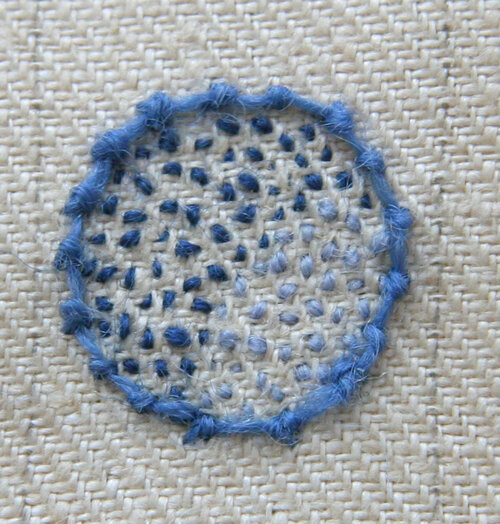 Here's a little circle with seeding in two colors and coral stitch outlining it. The seeding is OK. I'm not sure if seeding is meant to be all the same sized little stitches or not. I attempted to work each stitch over one thread of the fabric, but as the fabric threads are sometimes different thicknesses, the outcome was not completely uniform. I love the look of seeding.
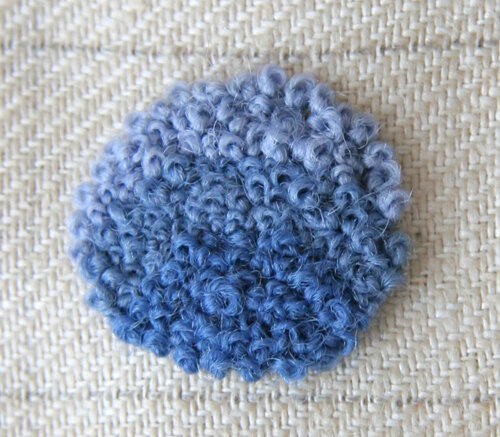 My French knot circle took the longest but one other of the elements I've done so far in the sampler. I divided the little circle into three crescent shapes and shaded the knots from dark to light. Each knot isn't the same tension or size and I really don't know a way to ensure that when working knots so closely to one another. That's one question I'll have for my teacher!
 Last up are bullion knots. Again, I admit it freely - I goofed up big time. I blithely worked along, making knot after knot until I got to the next to last knot when I realized that I HADN'T BEEN USING MY MILLINER"S NEEDLE! Unbelievable! I was so involved in using different colors of thread and making some of the knots full length and other half length that I completely forgot. Can you tell which knot I DID use the milliner's needle for? Yep, the last one on the right. I'm pleased with the pattern created by the different colors and lengths of knot, but NOT pleased with the bumpy mess from using the wrong needle. I may do them again at the end of the whole piece. We'll see. Grrr.So far the sampler idea is doing exactly what I hoped -it's giving me a chance to focus only on technique, to review each stitch and to pay attention and notice all the different ways a stitch can be explained. It's also exciting to be getting "more ready" for the course!
